


First and foremost, assess the damage to the exterior covering. Evaluate whether the surface has minor scratches or deeper cracks. For slight imperfections, a polishing compound may suffice, restoring shine and clarity effectively.
In cases of more severe damage, consider utilizing a flexible adhesive designed specifically for automotive coverings. This approach ensures the adhesion remains reliable even during temperature fluctuations and impacts.
For scuff marks, a heat gun can be an invaluable tool. Gently warming the affected area allows the material to reshape itself. Be cautious not to overheat, as this can lead to warping or further damage. After shaping, apply a specialized coating for added protection and a polished finish.
When dealing with color discoloration, a targeted repair kit can offer a tailored solution. These kits typically include various paint shades and clear coats, ensuring a seamless blend with the surrounding area.
Lastly, regular maintenance plays a key role in prolonging the lifespan of your car’s exterior components. Regular cleaning and the application of protective wax can help in maintaining the appearance and integrity over time.
Preparing the Plastic Surface for Repair
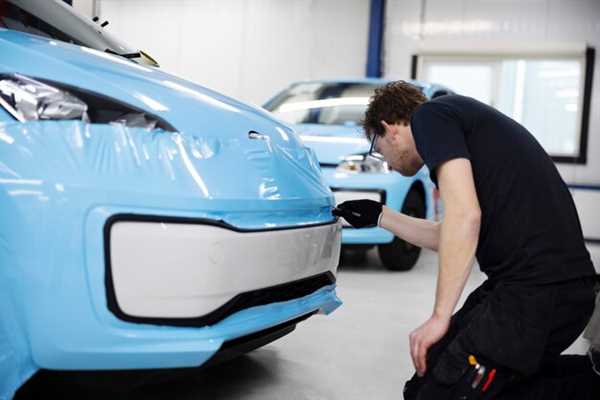
Begin with thorough cleaning using a suitable detergent or solvent to remove grime, grease, and old polish. Scrubbing with a microfiber cloth ensures that dirt does not interfere with adhesion.
Next, inspect the item for damage like cracks, dents, or scratches. Identifying these issues early on allows for targeted repairs, saving time and effort.
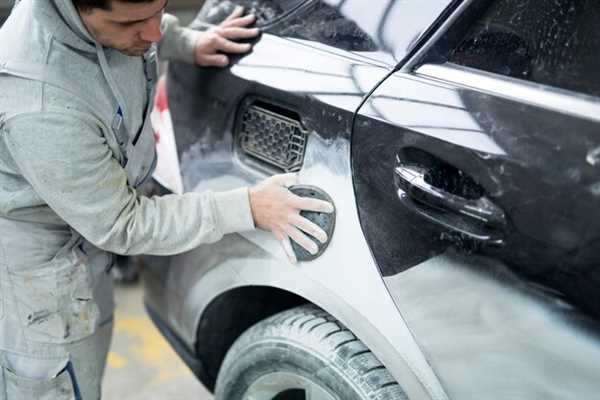
After cleaning, use sandpaper or a abrasive pad to scuff the surface lightly. This step enhances bond strength by creating a rough texture that will help the filler and paint adhere better.
For deeper scratches or blemishes, fill them using an appropriate material. Ensure that it is smoothed to match the surrounding area. Allow adequate drying time before proceeding.
Apply a primer that is specifically formulated for synthetics. This layer can significantly improve paint adhesion, ensuring a long-lasting finish.
Check the ambient conditions, such as temperature and humidity, since these factors affect curing and drying times. Ideally, work in a controlled environment where consistent conditions facilitate optimal results.
Final inspection is critical: look for missed spots that may need additional sanding or filling. A smooth, even surface is essential for a professional appearance after finishing.
Once satisfied with the sanding and priming steps, proceed with painting. Aim for consistent and even coats to achieve a polished look that will stand the test of time.
Choosing the Right Adhesives and Fillers for Bumper Repair
Select epoxies specifically designed for high-impact applications. Such products provide robust bonding capabilities and resist environmental factors. Look for formulations that adhere well to various surfaces including thermoplastics and composites.
Avoid flexible adhesives if a rigid repair is necessary. Rigid adhesives offer durability and strength, essential for maintaining structural integrity. Make sure to verify the compatibility of the adhesive with the material type of the components being repaired.
- Consider using flexible fillers for minor surface imperfections. These fillers can expand and contract with temperature changes, maintaining a seamless finish.
- Rigid fillers might be preferable when dealing with deeper gouges, ensuring that repairs withstand impact without cracking.
- Review the drying time of each adhesive and filler. Fast-curing products allow for quicker turnaround, which is beneficial in a busy workspace.
Prioritize products that provide excellent sandability, allowing for smooth finishing post-repair. The surface preparation is crucial to achieve optimal results.
Test any new adhesive or filler on a small area before full application. This ensures compatibility and prevents unexpected reactions that could compromise the repair.
Investigate manufacturer recommendations regarding the preparation process. Proper cleaning and priming of surfaces can significantly enhance the bonding process.
Always prioritize safety. Use personal protective equipment while handling these materials to avoid skin contact and respiratory issues.
Techniques for Painting and Finishing Restored Bumpers
Begin the process by thoroughly cleaning the surface. Use an appropriate degreaser to eliminate any contaminants, oils, or residues that can affect adhesion during the painting phase. Following the cleaning, lightly sand the area with 320 grit sandpaper to create a suitable texture for paint to grip while also preventing imperfections in the finish.
After sanding, apply a high-quality primer designed specifically for flexible materials. This step is vital, as it not only helps the paint adhere better but also seals the surface, providing a uniform base for the topcoat. Allow sufficient drying time as per the manufacturer’s guidelines, ensuring that the primer is fully cured before moving on to painting.
For painting, choose a high-grade automotive paint. Use a spray gun for an even application; maintain a consistent distance from the surface to avoid runs and drips. Apply multiple thin coats instead of one thick layer to achieve a uniform color and finish. Allow each layer to dry completely before applying the next.
After applying the final coat, allow it to cure properly. Once cured, wet sand with 2000 grit paper to remove any imperfections. Finish by polishing with a high-quality automotive polish to achieve a glossy, smooth surface that mimics the original look of the part.